Creating the cells
Creating the Cell component
In the previous section, we worked on creating the board component. However it is not fully complete. The board needs distinct cells. This are the small squares that hold the pieces. As mentioned before, the board has 64 cells arranged in 8 rows and 8 columns. The cells are alternately colored light and dark. (You can read more about how a chess board is set up here, this is optional as we will be going through all this)

The cells are a crucial component of this game, they help us identify the position of each of the pieces and determine how the pieces can be moved.
In src/components, let's create a new folder named cell and create a new file
index.jsx in /cell, this will hold our cell component. Let's create another file inside cell and save it as cell-styles.css. It will contain the styling for this component.
Let's add the following code to the cell component in components/cell/index.jsx
We create a functional component called Cell. This component will receive some props (properties). Any properties passed to a component are always received as an object and hence can be destructured out. We receive cell and index as our props. The cell will be an instance of Cell, with the pos and piece properties. We also receive index as a second prop.
This is the index of the cell in the board array.
We will be using the index to determine whether a cell should be light or dark.
Inside our component, we are calling the isLightSquare function, which we import from functions and providing the cell's position and index as its arguments. This function determines whether a cell should be styled as light or dark based on this parameters. It returns true if a cell should be styled as a light square. We will be creating this function shortly
Cell returns a div with some text content passed as cell.pos to render the cell's position
e.g a1. We wrap this in braces {} as all expressions inside our JSX markup should be.
Dynamic classNames in JSX
Notice the className set to the div we are returning. It's an expression created with an ES6 template string (using backticks {``} ) , which helps us easily use expressions in strings. We provide cell as the first className, next we use a ternary expression to assign a second className of light or dark based on whether the light is true. To use expressions in template strings they have to be enclosed in ${}
This shows how we can use template strings to provide dynamic classNames based on conditions.
Styling
We already importing our stylesheet. Let's add some css in cell/cell-styles.css to style the component.
For the cell class, we are using display:flex justify-content: center align-items: center to center the content in our Cell horizontally and vertically. For now, the content is a text containing the cell's postion but later on, the content will be a chess piece.
We are also using the css calc function to calculate width and height values that fit well in our board.
Next we define light and dark classes that set the background color.
Defining isLightSquare function
Let's create the isLightSquare function we used earlier in our component that determines whether a square should be styled as light or dark. Having alternate dark and light squares is just for aesthetics and color doesn't make a cell special in any way.
Inside our functions folder, src/functions, let's create a new file and save it as light-square.js. Within this file let's define the isLightSquare function.
It takes two arguments, the position of a cell and its index. Recall that the position of a cell consists of its column and row a1.
Next we create a helper function that determines if a number provided is even by returning true and false if otherwise.
If you examine a chess board closely, you will notice that if the number of a row is odd, then all the cells in even positions are light-colored and if a row is even, then all the cells in odd positions are light-colored. This assumes that we count our cells from 1, 2 and so on, that's why we use index + 1 as it is easier to count and determine this from 1 instead of 0.
Based on this observation, we write some conditional checks that return true from this
Finally let's export this from our index.js in functions by adding
With that, let's go to our Board component in src/components/board/index.jsx and make use of the Cell component we have created.
We are looping through the cells array we receive as props and creating a new Cell component from each item in that array. We are passing the cell and index as props to Cell which are being used in this component. We also provide a unique key attribute.
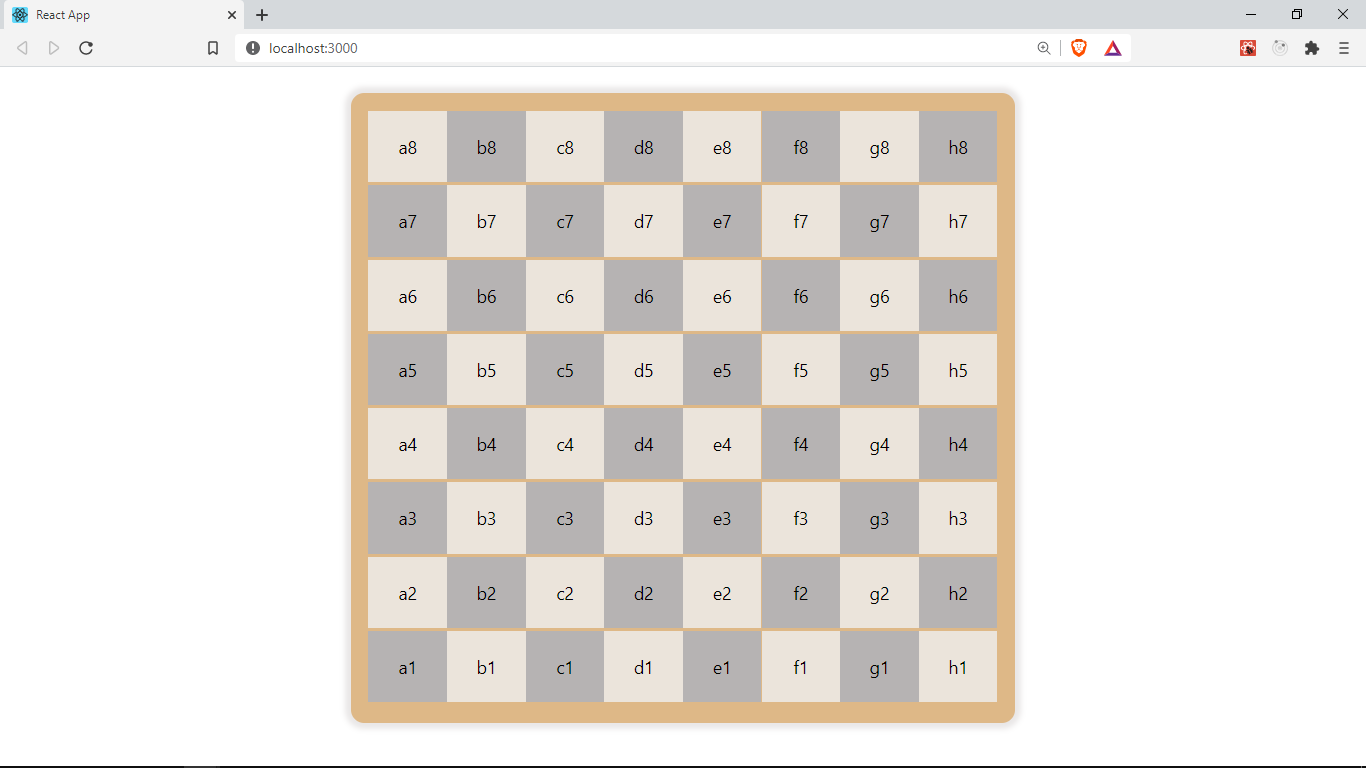
Finally this is what we have at the moment. A step closer 😊
You can find the code for this lesson here
In the next section, we will be adding a Piece component for the chess pieces in our Cells.