Highlighting possible moves
Overview
In the previous section, we were able to drag and drop pieces to make moves. In this section, we will focus on improving our players' experience by highlighting some of their valid cell options (candidate cells) once they start to drag a piece.
So far, we have been working with useState to manage state/data in our Game component and then passing down that data to other components such as Board and Cell through props. Whenever we update the state, e.g by calling setFen, our Game component is updated and so are our our other components since they receive new props.
Context API
To highlight valid cells for a move, we can follow the same approach by creating a new variable to hold the valid moves i.e const [validMoves, setValidMoves] = useState([]) and then pass down the validMoves value via props to the Board then to the Cell component that needs to be updated.
While this approach will work, as we add more features and state values to our game, we will also have to pass in more props down to our components. To avoid this, we will use another state management solution by React called the Context API. It allows us to share state values between components without having to pass them around through props. This will help us manage more values in state such as candidate cells, game over status, captured pieces and more, without passing in more props to our Board, Cell and Piece components.
To get started create a new folder in src and name it context. In the context folder, create a new file GameContext.js.
In GameContext.js, add the following
We create a new context object using createContext(), and provide an initial state value, which is our object with possibleMoves: []. Next, we create a GameProvider component, it takes a special prop called children. The children prop refers to the child nodes or content passed to this component within its tags. See the short example below
Next we use the useReducer hook. It's an alternative to useState. It makes it easier to manage and update complex or deeply nested state values. It takes in a reducer function, which is a function that updates the state, and the initial state value, initialState. It also returns an array with two values. The first value is the state and the second value is a function called dispatch that is used to trigger state updates. Whenever we call dispatch, the reducer function we passed in i.e GameReducer is going to be called to update the state.
Finally, we return the children wrapped in GameContext.Provider. GameContext.Provider takes a value prop where we pass the values we want to share with all the components in this tree.
For the value prop, we provide an object with all the properties in our state, which in this case is only the possibleMoves array, we also provide dispatch so that we can easily trigger state updates from nested children components.
That's it for the context set up. Let's create our GameReducer function in src/context/GameReducer.js. Create the GameReducer.js file in the context folder and add the following code.
Reducers
A reducer is a function that updates our state. It takes in the previous state value as its first argument and an action as its second, and based on the type of this action, it returns a new updated state.
This actions are usually dispatched from our components as we will see in a moment.
We use a switch statement to check the action type and handle different cases. If the type of action dispatched is types.SET_POSSIBLE_MOVES we return a new object and update the possibleMoves property to what is returned from getPositions(action.moves). When this action is dispatched from our Game component, the reducer will receive a property from the action called moves, it will be an array of the possible moves that need to be set e.g [a3, a4]. The items in the array are the cells that a piece can move to e.g a3, however some items can also include the piece as well as the cell e.g ['Na3', 'Nc3', 'Nf3', 'Nh3']. That's why we use the getPositions function to extract the cells and pass this value to our possibleMoves property.
When the type of action dispatched is types.CLEAR_POSSIBLE_MOVES, we update our state by returning a new object and setting the possibleMoves property to []. We will dispatch this action after the player finally makes a move and we now need to unhighlight any highlighted cells.
Actions
Let's create a file for this actions in src/context/actions.js. Actions are just strings that express various events/intents in our app. We define them as variables so that they can be easy to reuse and also to avoid mistyping them.
Let's add the following actions for now
useContext
Now let's make use of the context values in our components. In order to share context values between components, we need to wrap the components in a Provider component, in our case GameContext.Provider.
So let's wrap the main App component in src/App.js using the GameContext.Provider component we created earlier. This makes the values we passed in the value prop of the Provider component accessible by its child components as we shall see in a moment.
In the Game component we need to make the following additions. The rest of the code remains unchanged, only add the new parts :)
First, we import the useContext hook from React. useContext takes in a context value created using React.createContext like our GameContext.
useContext gives us access to the state values we provided in our context provider i.e GameContext.Provider such as dispatch.
In the setFromPos, which is called once a Piece is dragged (onDragStart), we make use of the dispatch function to dispatch an event of type
types.SET_POSSIBLE_MOVES, we also provide a moves property whose value we get from calling
chess.moves({ square: pos }) which returns a list of possible moves. Our GameReducer is called and it updates our setPossibleMoves array with the action.moves dispatched. Any the object we provide to dispatch({}) is received by our reducer as the value of action
In the makeMove function, we dispatch an action of type types.CLEAR_POSSIBLE_MOVES
Our reducer function is called and it receives this action and updates our state by setting possibleMoves: []. This will unhighlight any cells that had been highlighted.
To highlight our cells based on whether they are candidate moves, we need to get the current array of possibleMoves from our state. We can do that in the Cell component by using the useContext hook and providing our GameContext.
We get the possibleMoves from state and then check if this Cell's position is a possible move by
possibleMoves.includes(cell.pos)
In our return statement, we wrap our Piece in a div with a className overlay, we also apply the className possible-move conditionally if this cell is a possible move. That className adds a linear gradient to our cell to highlight it. See the modified css below
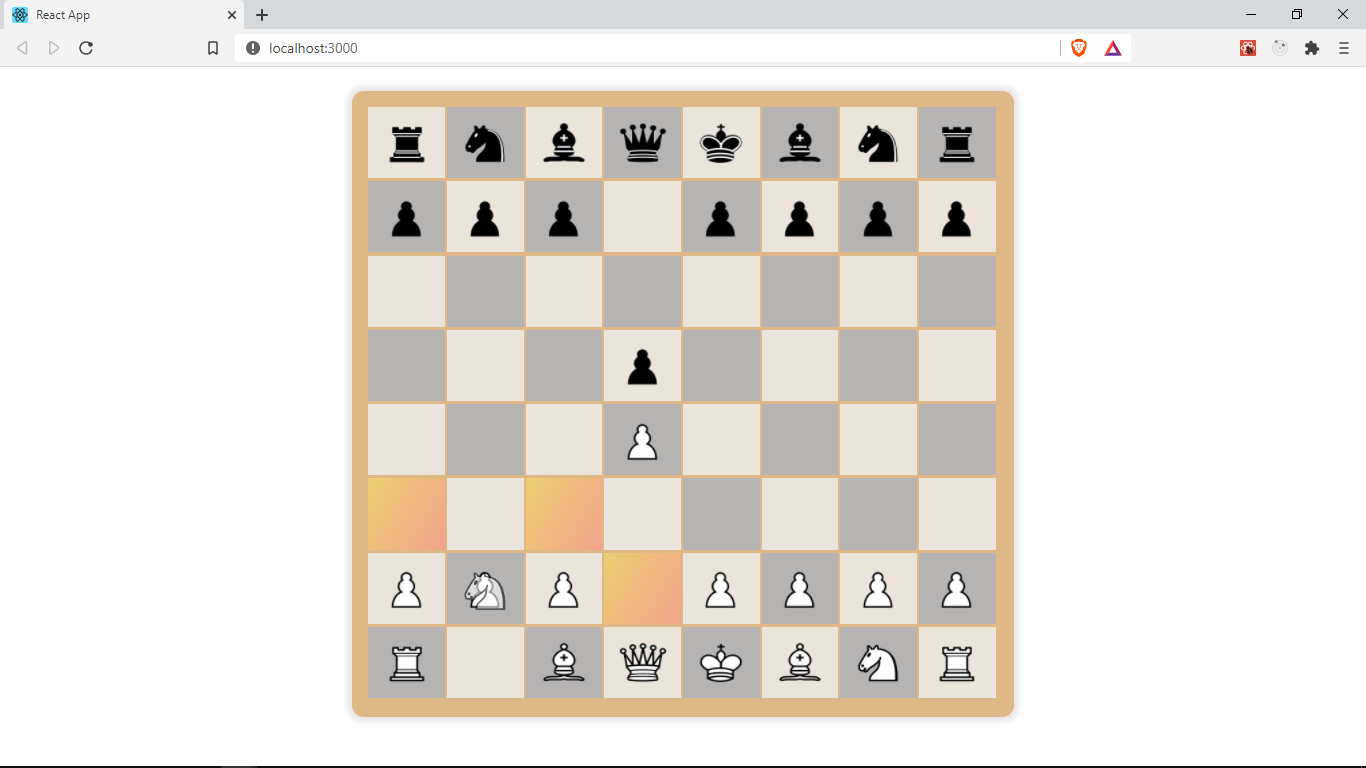
With that in place, we now get some highlighted cells to show us the valid moves we can make whenever we drag a piece. (Candidate cells)
Get the completed source code for this lesson here